Pages

Saturday, May 17, 2014

3D Printing: The Hype vs. the Reality


Thursday, May 8, 2014

Animated GIF – Tutorial

LEARNING TARGETS:
»  I can create an animated GIF with Adobe Photoshop.
»  I can add text in an animated GIF with Adobe Photoshop. 
»  I understand the responsibilities and ethics associated with publishing to the internet
 
EXPECTATIONS:
»  CREATE:  Create an animated GIF showing the subject lit with:
                   - A Key Light
                   - A Key Light + A Fill Light 
                   - A Key Light + A Fill Light + A Rim Light
»  REFLECT: 
Document the whole process in your blog and reflect what you learned.


http://creativetechs.com/tipsblog/build-animated-gifs-in-photoshop/
You should have a minimum of 4 images labeled:
1-Point Lighting
2-Point Lighting
3-Point Lighting
Final 3-Point Lighting

*Note the GIF below is missing the final 3-Point Lighting image.

Monday, March 10, 2014

Intro to 3D Assignment Checklist


GENERAL
  • I have created a blog with www.Blogger.com and have given Cornell the address.
  • The blog should have the following:
    • I write a post in my blog every class.
    • My blog shows 20 posts per page.
    • I have a link to my project’s outline. 
  • I have written 2-3 paragraphs about the Future of 3d Printing and posted it in my blog.
  • I have brain stormed & sketched ideas of things that can be 3D Printed 2+ pages & put my blog.
  • I have registered with the classroom resource site 3dStudents.com and confirmed the registration.

Concept Model Sheet (CMS):
PLAN / DESIGN
  • I have created 2 – 4 pages of initial thoughts and designs for the CMS project & posted in my blog.
  • I have created a ‘Virtual Corkboard’ using Pinterest.com an added a screenshot and link in my blog.
  • I have created a ‘Mind Map’ of my potential design directions using Lucid Charts.
  • I have created 2 – 4 pages of ‘Thumbnail Sketches’ inspired from my ‘Mind Map’ & posted in my blog.
  • I have created 3 ‘Draft Sketches’ derived / inspired from my Thumbnail Sketches’ & posted in my blog.
  • I have chosen a draft sketch, created a  ‘Final Draft’ & posted in my blog.
  • I have created a FINAL Concept Model Sheet of my design, posted in my blog, & turned it in to Cornell. 
  • I have created 2 – 4 pages of initial thoughts and designs for the robot project & put my blog.

CREATE
Regular Assignments:
  • I have completed the Temple with extra features and posted an image of it in my blog.
  • I have completed the Juice Glass and posted an image of it in my blog.
MINI Assignments:
  • I have completed the Extrude Along a Path mini project and posted an image of it in my blog.
  • I have completed the Bevel mini project and posted an image of it in my blog.
  • I have completed the Deformers mini project and posted an image of it in my blog.

HOMEWORK
  • I have taken 20+ abstract photos emphasizing compositional rules and post them in your blog.  (link)
  • I have chosen 5 of the 20 photos that best exhibit the compositional rules & describe the rules used and post them in your blog. (link)

Thursday, February 27, 2014

Vocab Review #1

Define these terms in your own words, in your blog. 

*USE IMAGES IN YOUR DEFINITION FOR EACH.

  • Analogous Colors
  • Complementary Colors
  • Primary Colors
  • Secondary Colors
  • Tertiary Colors
  • Asymmetry
  • Symmetry

Sunday, December 15, 2013

-- Intro to 3D – Final Checklist --


Just a reminder, I will be attending the International Robotic Olympiad Monday – Thursday and will not be at school during these days. However I will be at school Friday if you need to speak with me before break.  Mainly you are to finish and prep all your work for the end of the semester.
 
You are finishing the following projects:
  • Helmet – Model Only
  • The three mini rendering assignments
    • Apple
    • Orange
    • Light Table
  • One-Point Lighting Test Render
  • Lightsaber Model Only
    • Close-ups of all the important areas
      • Over All
      • Control Box
      • Nubs
      • Ring
  • Lightsaber Final Render
    • Image Based Lighting –HDRI
    • Clean

You also need to define the following vocab.


-- Intro to 3D – Final Checklist --
The three mini rendering assignments (*Not MYP)
  • The Apple
  • The Orange
  • The Table Light
 
  • 1- Point lighting set-up
    New_1-point light
  • HDRI Material Experimenting
    • Same object with one point lighting
    • Render with 3 Images

  • Lightsaber Final Model
    [final%2520lightsaber%25202%255B2%255D.jpg]
  • Lightsaber Final Render

    [final%2520lightsaber%25203%255B1%255D.jpg]
  • MYP FINAL PROJECT


Thursday, December 12, 2013

Abridged Assignment.

Create Subject.

Setup

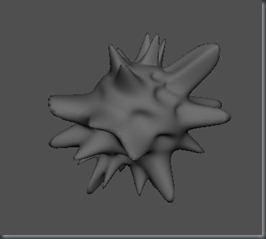
  • Create a plane as the ground  and (CUBE and Smooth it Twice) as the main subject.  Set the sphere on the ground.  I made the plane HUGE.

  • Select your sphere and in vertex mode randomly select, using constraints, a small percentage of vertices scaling them out.

Something Like this:
Capture50
Capture57Select your polygon sphere.  Open the Select > Select Using Constraints menu and select  Current and Next.  Then under the Random Tab, check Activate.  Now you can use what ever ratio you want, I used 0.2  Using this tool, will randomly select vertices of a given object.  Now every time you select all the vertices, you will randomly select 20% of the objects vertices.  

Now select all the vertices on the sphere, notice it randomly only selects 20% of the vertices.  I then scaled the vertices out. 

Capture58
Capture59

I repeated this a few time scaling both in and out.   Then I activated the smooth preview and got something like this.

Capture60
Capture61

Capture51

Set Render to Mental Ray:

Open render settings and change render using . . . Switch to Mental Ray.  If it does not appear, activate it by: Window > Settings/Preferences > Plug-in Manager > then check the boxes for Mayatomr.mll.

CREATE CAMERA

Create Key Camera: Create > Cameras > Camera then while the camera is selected in one of the panel views (side, front, top) choose Panel > Look through Selected. Then label the camera “Render Me” or “My Camera” a naming convention that your team uses and manipulate each camera accordingly.

Untitled-1Now you should be looking through the camera labeled “Render ME”. We need to add one more thing, show resolution gate. There are two ways to do this. View > Camera Settings > Resolution Gate or press the resolution gate button.


LIGHTS

*First, I want to note that Maya has a default light that is always on until you create a light and then the default light is then turned off.  You do not need to, but you can turn off the default light in the Render Globals → Common Render Options and then uncheck Enable Default Light.  The default light may will explain why the scene may drastically change when you add your first light. 

ADDING LIGHTS
Spotlight

There are a number of attributes you will need to control the spotlight.  Here are the most important:

Changing Decay Rate
Changing Decay Rate controls how quickly the light’s intensity decreases over distance.  The default setting is No Decay.  I generally try to similar real world lighting, hence I use Quadratic Decay.


No Decay - no decay; light reaches everything

Linear - light intensity decreases directly (linearly) with distance (slower than real world light)

Quadratic - light intensity decreases proportionally with the square of distance (the same as real world light)

Cubic - light intensity decreases proportionally with the cube of distance (faster than real world light)

Changing-Cone-Angle

Changing the Cone Angle

The Cone Angle setting changes the angle (in degrees) from edge to edge of the spot light’s beam. The valid range is 0.006 to 179.994. The default value is 40.   The advantage of changing the Cone Angle is that you do not have to adjust your intensity versus when moving the light farther or closer.  *This does is irrelevant if “No Decay” is set on your spotlight. 

Changing-Penumbra-Angle

Changing the Penumbra Angle

The Penumbra Angle setting changes the edge of the spot light’s beam by widening the Cone Angle  in degrees.  The intensity of the light falls off linearly to zero. The valid range is -179.994 to 179.994.  The default value is 0.


Changing-Dropoff[3]

Changing the Dropoff

The Dropoff setting controls the rate at which light intensity decreases from the center to the edge of the spot light beam. The valid range is 0 to infinity. The slider range is 0 to 255.   Typical values are between 0 and 50.   The default value is 0 (no dropoff).

One Point Lighting  and Key Lights

The key light is the main or the strongest light in the scene that illuminates your subject.   It  is also responsible for the over all exposure and defines the most visible shadows.  It could be from any main light source from the sun penetrating in a window sill to the spotlight on a stage. In a classical 3 point lighting setup. it is generally placed 30 to 45 degrees to the right or left of the camera. This range for the key light helps bring out more texture and form (dimension) in the subject.


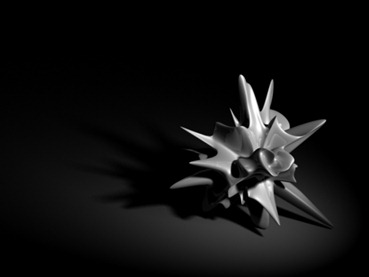
Here is an example of a model with 1-point lighting. She is only lit with a “key” light.
New_1-point light
Here is a 1-Point setup with the abstract shape.  The light is essentially in the same location as the models but our shape is completely different and captures more light.

Create Key Light: Create a spot light Create > Lights > Spot Light then while each light is selected in one of the orthographic views choose Panel > Look through Selected. Also label the light“Key Light” then Manipulate each light accordingly placing it about 30 to 40 degrees to to left or right of the camera.

SHADOWS There are two main choices for shadows Raytrace and Depth Map.  Depth map shadows and ray traced shadows produce similar results, Capture52though depth map shadows usually take less time to render. Maya documentation suggests to choose depth map shadows unless they cannot accomplish your visual goal; I disagree.  The quality and control is more superior with Raytraced shadows and that is what I generally use.

On your main light, the "Key light,” activate Ray Traced Shadows, check Use Ray Traced Shadows, and change the light radius to somewhere between  1–10, (it could be lager or smaller) it all depends on the scale of the  scene and  the distance the camera is from the main objects.   The shadow rays adjusts the quality of the shadow.  This can drastically slow down your render times.    I tend to start with at least 10 and increase it to may 40 for the final render.  This will remove the “grittiness” in the shadow.


  •  

  •  

  •  

  •  


Light Radius

– This defines the area from which the light is coming. The larger the Radius, the softer our shadows will be.

  • Shadow Rays – Increasing this will increase the samples of our shadow quality, but will also increase our render times.

  • Ray Depth Limit – Is the limit of how many times the light ray will bounce from one surface to another.

    1st Render – One Point Perspective: Key Light with ray traced shadows.
    Save render as 1-Point_Perspective and make sure you change it to a JPG format.

    • Post render in Blog.

  •